This tutorial will cover simple output and how to declare Constants. The program's main purpose, however, is to teach you how to use EASy68K.
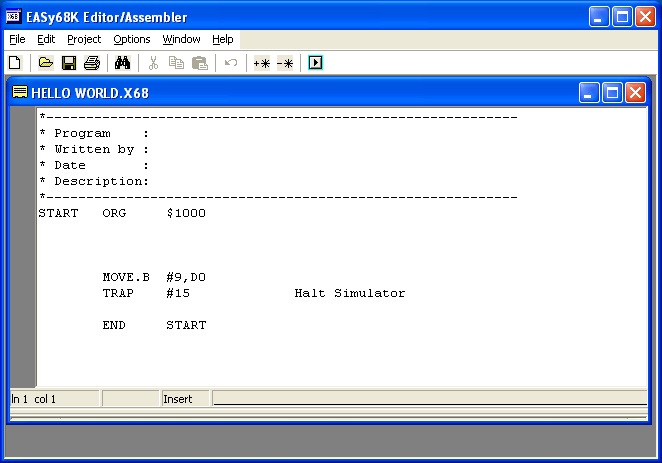
- When you open the EASy68K editor/assembler
(EDIT68K.exe) you will see a screen similar to this:
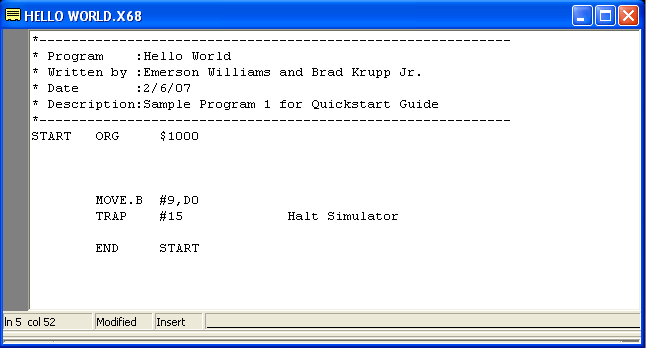
- We will start by making comments for what this
program does.
Now we will begin coding.
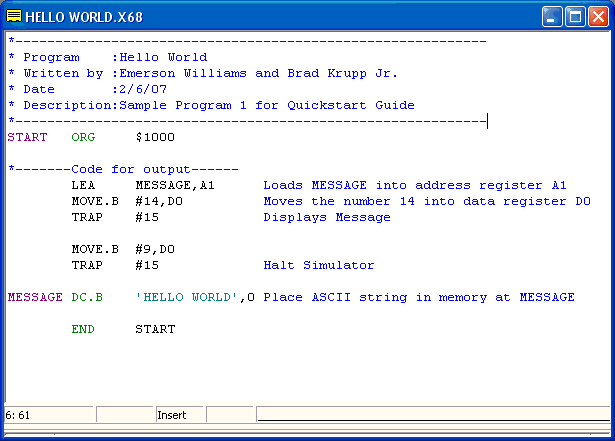
- The LEA command stands for Load Effective
Address, which in this case it loads the address of
the item labeled MESSAGE into address register A1
- MOVE.B stands for Move Byte (could also be MOVE.W for
word or MOVE.L for long), #14 means the
literal number 14 (if we just used 14 it would be memory location
14). D0 is a data register. Once this instruction has been
ran D0 will contain the number 14.
- TRAP #15 does a Simulator input or output command based on
the contents of D0 hereafter these will be referred
to as trap tasks for example:
MOVE.B #14,D0Here is a list of various trap tasks and what they do.
TRAP #15 Is trap task 14
MOVE.B #4,D0
TRAP #15 Is trap task 4
For a list of trap tasks to use for purposes other than Text I/O consult the EASy68K help section.
- MESSAGE is a label DC.B reserves
memory for the item following it (in this case our message)
because trap task 14 requires a NULL to terminate
the string we must follow our message with 0.

- Now we will assemble and run our program, first
click the assemble button, which looks like this.
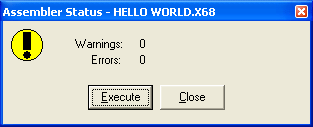
- Assuming you entered everything correctly you should
see this
- If you get an error make sure you entered everything
correctly, or you can get the completed file from here.
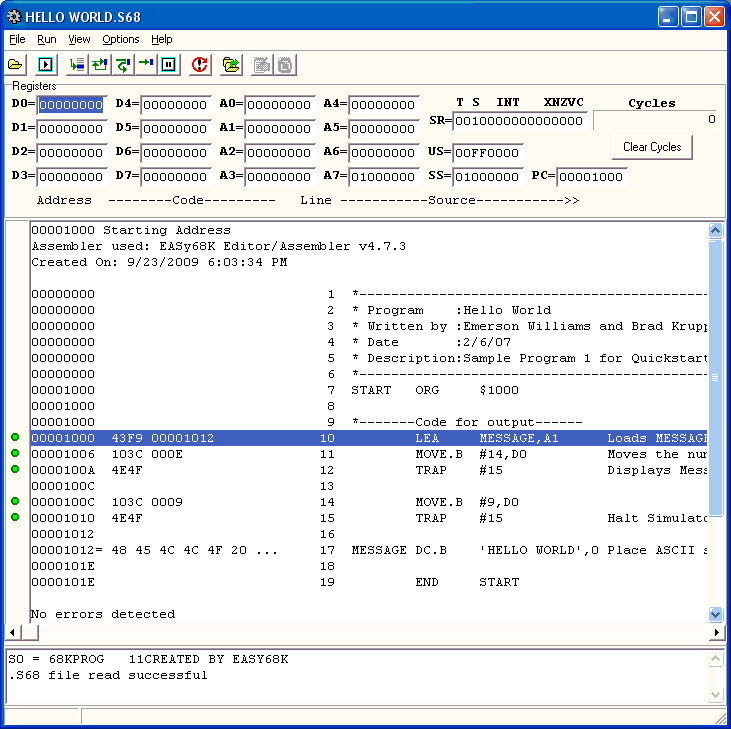
- Once the program is assembled without error click
the execute button, which will open the EASy68K simulator shown at the
left.

- Next to start the program you will press the run
button, which resembles the assemble button
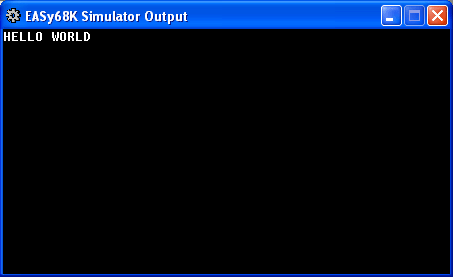
- After the program runs you should see this
- If the ouput window did not open click View
then Output Window. If it still does not work check the code
again.
Now we will add code to allow display of a new line.
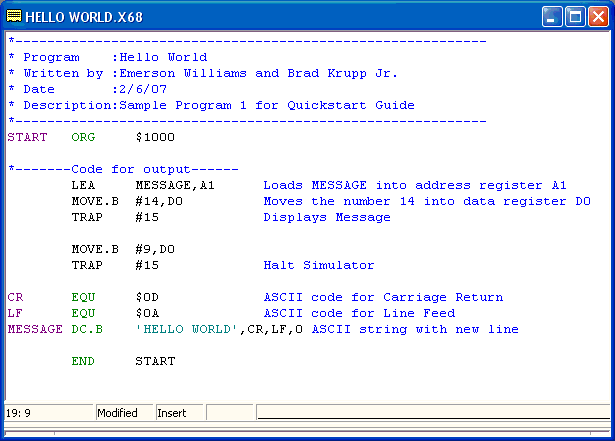
- Here is an example of the previous program with the
carriage return and line feed added.
- CR and LF are as labels to use in place of the ASCII
codes for the carriage return and line feed.
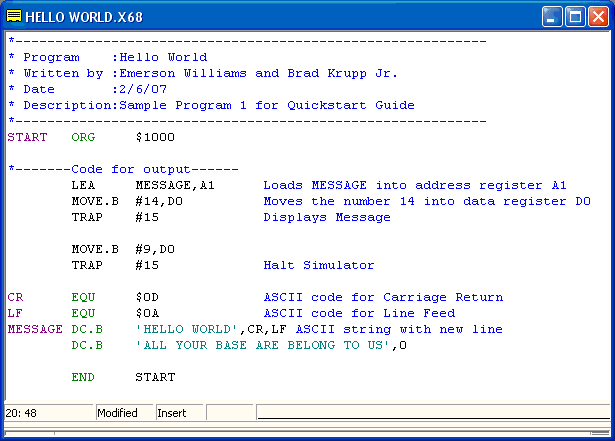
- This is how you would add a second line to your
message. The terminating 0 was moved to the last line.
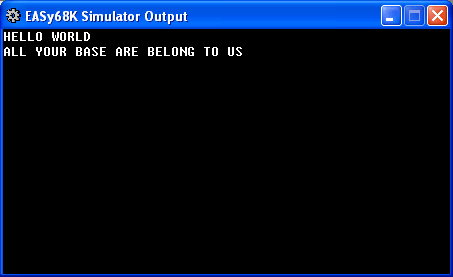
- Output of the code from above. Notice the text from
the second DC.B is on the next line.
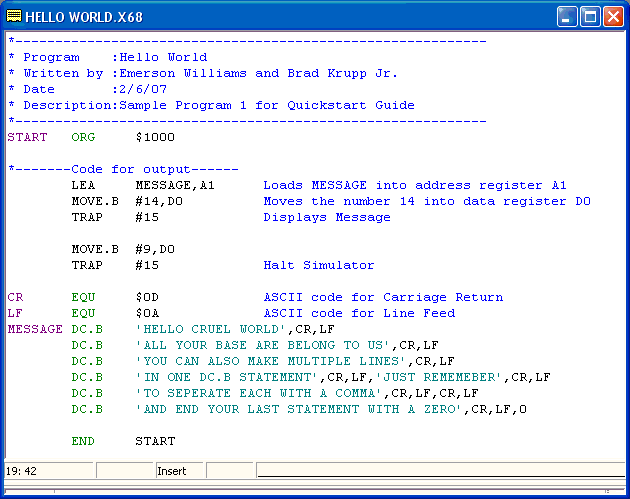
- The fourth line of MESSAGE shows how you can code
multiple lines of text in a single DC.B.
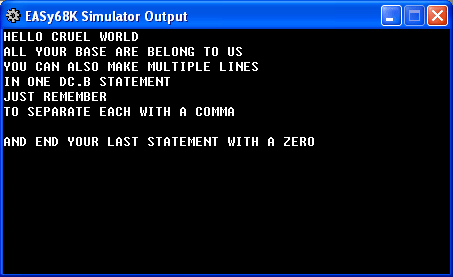
- Output of the code from above. Notice the fourth
DC.B's text is displayed on two lines. If your code does
not work, you can recieve the correct code here